
You’ve just grabbed yourself a sweet texture pack (if it’s not this one, then you’re missing out) and you’re excited to get going, but wait – what on earth is an .ABR file? Well, that’s a Photoshop Brushes file. Installing them is super quick and easy and you’ll be ready in no time. Follow these simple steps to realize your textured dreams.
Locate the .ABR files
You can either find these by their file extension, or by their icon. Depending on what version of Photoshop you have installed, they will look like one of the files below.

Install the brushes
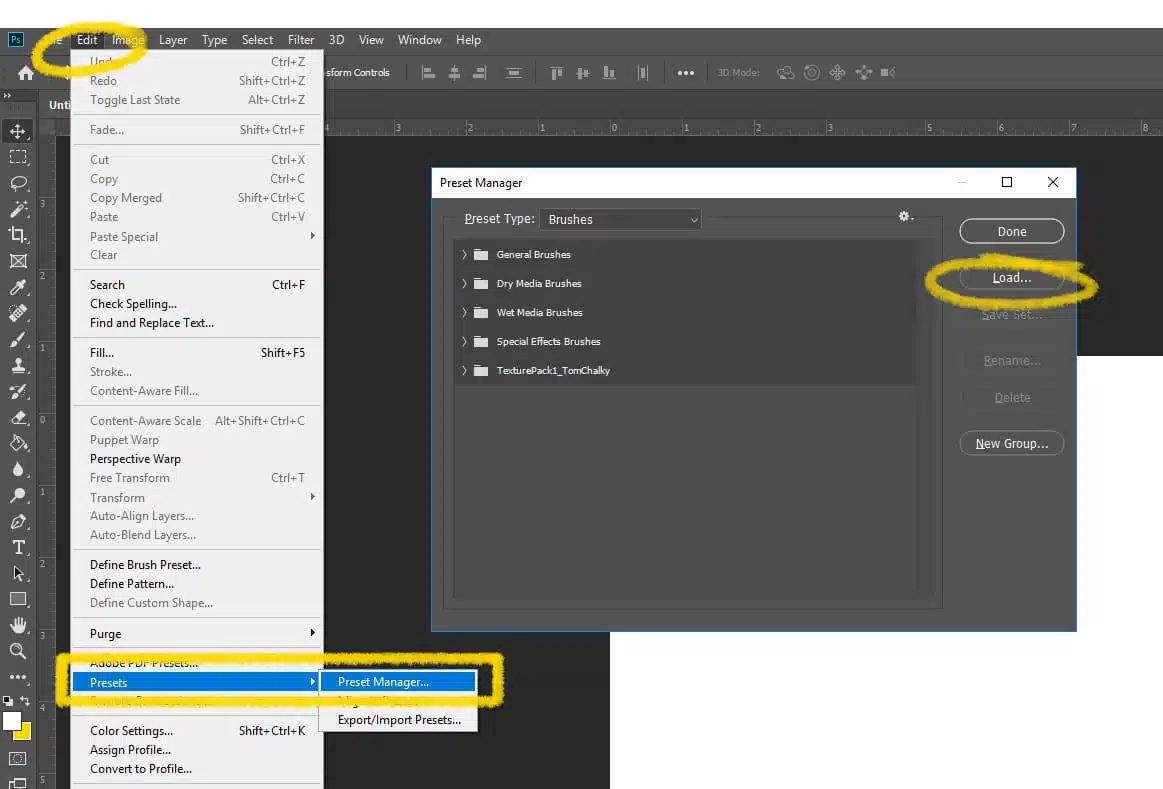
You can either drag the .ABR file(s) directly into Photoshop, alternatively, you can go to Edit > Presets > Preset Manager, select Brushes from the dropdown menu, and then add your brushes using the “Load” button.
That’s all folks!
There you have it; You have reached your destination. Hit the letter ‘B’ to activate the Brush Tool and select your brush via the dropdown menu in the toolbar.
If, for whatever reason, you have reached the end of this guide and have just noticed; “Crap, I don’t actually have any brushes, what am I doing here?” Then allow me to introduce you to my Assorted Paint Texture collection, also, I have some free photoshop brushes that you can download here for a test drive 😉

What a great help that was! All installed 😀
I loaded the brushes as advised and the Abr. are gray. I can not ‘load’ the brushes. What am I doing incorrect?
Thank you so much, I’ve spent hours trying to load brushes from previous downloads that have always loaded with a click, tried numerous suggestions and then luckily found this. Many Thanks