Posted on 2 Comments

How to Install and use Photoshop Brushes (.abr files)

You’ve just grabbed yourself a sweet texture pack (if it’s not this one, then you’re missing out) and you’re excited to get going, but wait – what on earth is an .ABR file? Well, that’s a Photoshop Brushes file. Installing them is super quick and easy and you’ll be ready in no time. Follow these simple steps to realize your textured dreams.

Locate the .ABR files

You can either find these by their file extension, or by their icon. Depending on what version of Photoshop you have installed, they will look like one of the files below.


Install the brushes

You can either drag the .ABR file(s) directly into Photoshop, alternatively, you can go to Edit > Presets > Preset Manager, select Brushes from the dropdown menu, and then add your brushes using the “Load” button.

That’s all folks!

There you have it; You have reached your destination. Hit the letter ‘B’ to activate the Brush Tool and select your brush via the dropdown menu in the toolbar.

If, for whatever reason, you have reached the end of this guide and have just noticed; “Crap, I don’t actually have any brushes, what am I doing here?” Then allow me to introduce you to my Assorted Paint Texture collection, also, I have some free photoshop brushes that you can download here for a test drive 😉

Posted on 2 Comments

How to Install and Use Your New Font in a Few Simple Steps

You’ve just grabbed your new fonts and as you have found your way here, you’re likely wondering what the heck to do next. How do you install your font(s)? What software do you need? What on earth is an .OTF? Well, worry not, in a few moments you’ll have all the answers. The best part is that you do not need to memorize anything, this guide will always be here.

Throughout the guide, I’ll cover the following topics;


What do I need to use your font(s)?

You need a computer, some basic design software, and well, that’s it! After installation (How do I install fonts?) restart your machine and your new font(s) will appear and be ready to use within your chosen software.

Please note: As my fonts are display fonts (see below) you may experience rendering issues within word processors and/or out of date software. If this is the case for you, contact me. There is a fix 🙂

A display typeface is a typeface that is intended for use at large sizes for headings, rather than for extended passages of body text. Display typefaces will often have more eccentric and variable designs than the simple, relatively restrained typefaces generally used for body text.


What on earth is an .otf and a .ttf file?

Oh, the joys of file formats. If you’re new to the gloriously confusing world of design, you have probably already noticed the ridiculous amount of file types thrown about the place.

There are many different formats of fonts that can be installed, however, the most common are .ttf (TrueType) and .otf (OpenType). With OpenType being the newer, more favored format. They will both work on Macintosh, Windows, and Linux machines.


How to Install a font

There are a few ways that fonts can be installed to your machine and below I’ll cover the most common (and easiest) ways to do this on a Windows and Macintosh computer. If you want to look at different types of Font Managers, be sure to check out this article by my friend Chris Spooner.

How to install fonts on a Mac

If you have many fonts to install and/or cannot use FontBook (instructions for using FontBook) then this is the preferred method.

1. Download your new fonts

After you download your new design goods, unzip the file and locate the .otf or .ttf font files. You’ll likely have more than one.

2. Install the fonts

Open the ‘Finder’ window and click on ‘Users’ (or type it in the search box). Open the Users folder and double click on the house icon.

This is the account of the person currently logged in. Now, Double click the Library folder. Double click the Fonts folder. Finally, drag and drop all of the font files into this folder.

How to install fonts on a Mac using FontBook

1.  Download your new fonts

After you download your new design goods, unzip the file and locate the .otf or .ttf font files. You’ll likely have more than one.

2.  Install the fonts

Double click on the font you want to install and click ‘Install’ within the pop-up.

Please Note: When installing fonts with FontBook, you may receive a ‘Validation’ error. This is to be expected when installing detailed fonts such as the ones found within my portfolio. FontBook struggles to validate fonts with high node counts. You can safely ignore this and continue the installation.

These fonts will now be within your Fontbook. After closing and reopening your software of choice, the fonts will now be available to use.

How to install fonts on Windows

1. Download your new fonts

After you download your new design goods, unzip the file and locate the .otf or .ttf font files. You’ll likely have more than one.

2. Install the fonts

Open a new ‘File Explorer’ window and double click Local Disc (Usually C: Drive), double click ‘Windows’ and then ‘Fonts’. Finally, Drag & Drop all of your fonts directly to the ‘Fonts’ window.

Alternatively, you can double click on the font file that you’d like to install and click ‘Install’.


How To Uninstall A Font

If you want to remove a font that you no longer want or need, uninstall it with these easy steps

How to Uninstall a Font on a Mac

  • Open Font Book from the finder window and find the font you want to remove.
  • Right click on that font, and select Remove.

How to Uninstall a Font in Windows

  • Click the Start button, and find the Control Panel. Open Appearance and Personalization, then click Fonts.
  • Find the font that you want to uninstall. Highlight that font, then click Delete from the File menu
Posted on 2 Comments

How to Create your Own Watercolor Photoshop Brushes (Free Brush Pack Inside)

If you are looking to create your own Watercolor Photoshop Brushes but have no idea where to start, then you’re in the right place. It’s surprisingly simple and good fun once you get into the swing of things.

With the inevitable desire for all things handmade in our digital world, the request for Watercolor Photoshop Brushes and the alike have boomed (just look at the google trend). It’s the same story with Handcrafted Fonts and Hand Lettering! And where there is demand, there are people that supply (Psst…Take a look at my Assorted Paint Texture Collection). Whether you’re a professional or hobbyist, this tutorial will provide you with all you need to know to successfully create your own high-quality pack of watercolor brushes for Photoshop.

1. Scan your watercolor pieces using the highest resolution possible. There is no reason why I used colored watercolor, in fact, I recommend you use black for a better contrast. Tip: Solid black paint will not provide much texture when converted. Usually, a nice wash works best, you can always duplicate your layer to strengthen the contrast when desired.

2. Convert the scan to Black and White (Image > Adjustments > Black + White > Auto > OK)

3. Using the Brightness/Contrast options (Image > Adjustments > Brightness/Contrast) make the background as white as possible using the sliders while keeping the detail of the watercolor as high as possible.

4. Using the Lasso Tool (L) from the main toolbar, select one of the pieces and Edit > Copy (Ctrl + C).

5. Make a new document, the dimensions of the copied piece will automatically be the dimensions of the new document. Paste the watercolor (Edit > Paste) and select Edit > Define Brush Preset. If you see a box appear, follow step 6. If the Define Brush Preset option is grayed out, then your document is larger than the maximum brush size for your version of Photoshop. Newer versions allow brushes up to 5000×5000 pixels, older versions allow 2500×2500 pixels. Ensure that your image falls within these dimensions by changing the image size (Image > Image Size). Try re-sizing the largest dimension to 5000px, if it is still grayed out, re-size again to 2500px.

6. Type your desired Preset name (This will not be the name for your Watercolor Photoshop Brushes, just this particular preset), and click OK. Repeat from step 4 for each watercolor piece.

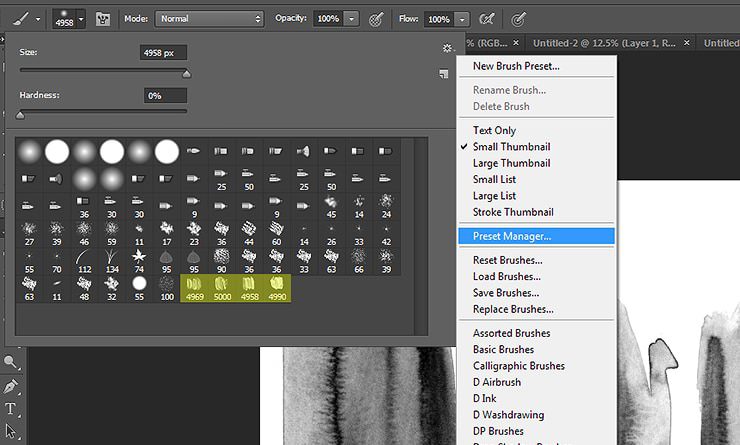
7. Once you have completed creating all of your brush presets, open your preset manager by selecting your Brush tool. You can find the preset manager by clicking on the drop-down arrow to the right of the currently selected brush preset, clicking the settings in the top right of the box, then Preset Manager.

8. Select your lovely brushes while holding Ctrl (or Cmd) and click Save Set. A box will appear and this is how you save your brush pack. The name you choose now will be the name for your finished Brush set. That’s it!

Thank-you for following the tutorial, if you found this useful be sure to share and comment below with your finished pack. I’d love to check them out. Click on the image below to download my brush pack for free.

I offer a bunch of Free brush packs over on Inspiration Hut (An art and design blog that I run with Abbie). Grab them all using the big sign up form on the homepage 🙂

Posted on 2 Comments

How to Create Watercolor Typography In Photoshop (Free Brushes Inside)

Within this tutorial, you will learn the most effective way to create watercolor typography in Photoshop using free resources created by yours truly. By following the very simple steps below you will transform your type into a lettering piece that looks hand painted. Before we start, I will be using this watercolor brush pack that I published to Inspiration Hut and the Petal Brush font from my Free Font Bundle.

1. Make a new document (I’ve used 800px x 600px). Select the Type Tool and type with your chosen font. This works with most style fonts, but for extra effect, I’ve selected my Petal brush font.

2. Right-click on your Text layer in the layers panel (the ‘T’ icon, not the text) and click ‘Select Pixels‘ (or Ctrl + Click on Layer). This will make a selection around your type. Make a new layer and hide the text layer just like the example below.

3. Selected the new layer and load your chosen Watercolor Brush pack. If you are using the same pack as I, please keep in mind that they were designed to work better with large artwork. So re-size your preferred preset to roughly fit 3-4 letters, by doing this, the quality improves drastically. Experiment with different presets and sizes until you’re happy with the results. Here is my result with the No.74 brush preset and a size of 600px (hover over the individual presets to see the number of the brush).

4. For the finishing touches, I duplicated the watercolor layer to increase the contrast and sharpened (Filter > Sharpen > Sharpen, then, Edit > Fade Sharpen > 40% > OK) the result. I also added a brush in the background on a new layer for an extra effect.

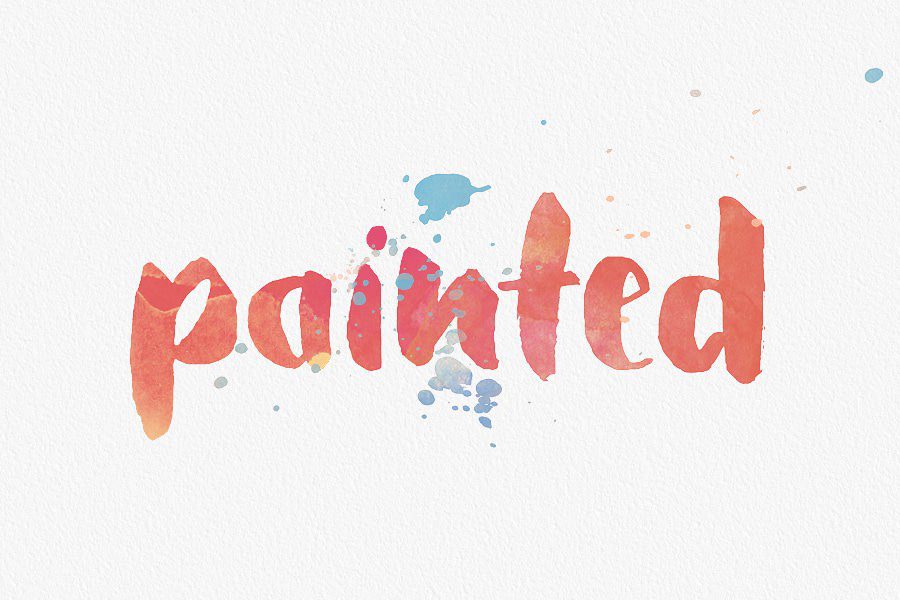
Now that we’ve nailed the basics – repeat the process and don’t be afraid to use color like I have in the example below. The splats were actually taken from a font that I designed (the Hamilton font family for Design Cuts)

More Examples – These examples were created using my Tallow Font Family and my Watercolor Brush Pack (No.1). My premium brush packs were created after learning a more effective way of converting artwork for digital use, so they are of a much higher quality than my free packs.

Useful Resource List :

Posted on 8 Comments

How to Remove the Background from a Sketch or Custom Lettering

This little trick is the easiest, most effective way to remove backgrounds from your sketches, custom lettering pieces, illustrations, and so much more. The quality of the end result is so good, that I use this solution to remove the background from the textures, fonts, and illustrations that I sell. For the purposes of this tutorial, I’m going to use a custom lettering piece that I drew up real quick.

1. Firstly, let’s get your image scanned. Ideally, you’d want to use a DPI of 300 or higher. However, I have used this technique many times with nothing but an iPad camera (so it’s ideal for quick pratice pieces). Here is my very rough lettering piece. Far from perfect, but that doesn’t matter! (read the tip below).

*Tip – You don’t have to nail your finished piece on paper. Everything can be edited. Don’t throw pieces away because your lowercase ‘a’ looks a little shitty, just carry on scribbling underneath. I’ve found that by doing this I become less frustrated and more creative with my work. Also, you can see that I have the tendency to create little extras surrounding my type. They might come in handy, you never know!

2. Change your image to Black and White (alt+shift+ctrl+b) by selecting Image > Adjustments > Black & White. You can leave the settings as they are, or do what I do, click auto then OK.

3. Navigate to Image > Adjustments > Brightness/Contrast. Tick the ‘Use Legacy‘ option, and play around with the sliders until the background is as white as possible and that the texture of the piece is to your choice. The soft style I’ve gone for below will allow for some of the photo to show through (or whatever you place behind).

If you want a solid fill, your contrast will usually be much higher than your brightness. Again, the numbers do not have to be exact. Once you’re happy, click OK.

4. The next thing you want to do is copy your image. Navigate to Select > All (Ctrl + A), then, Edit > Copy (Ctrl + C). Now that you have your image copied, select the ‘Edit in Quick Mask Mode‘ (Q). Then Edit > Paste. You will now have something that looks like the image below.

At this point, turn off the quick mask mode by selecting it again (or Q again). You’ll now notice that you have the inverted selection of your artwork. Now, Make a new layer (Layer > New > Layer), inverse your selection (Select > Inverse) and fill the selection with your desired color using the paint bucket tool (G) in the new layer. Delete the Background layer, and you will be left with something like this.

5. Technically that’s it, but I’ll finish this piece. I’ve grabbed a good’ol unsplash.com stock image and placed my lettering on top (I duplicated the lettering layer, and offset the bottom of the two layers, then changed the color to a dark grey to create the shadow effect).

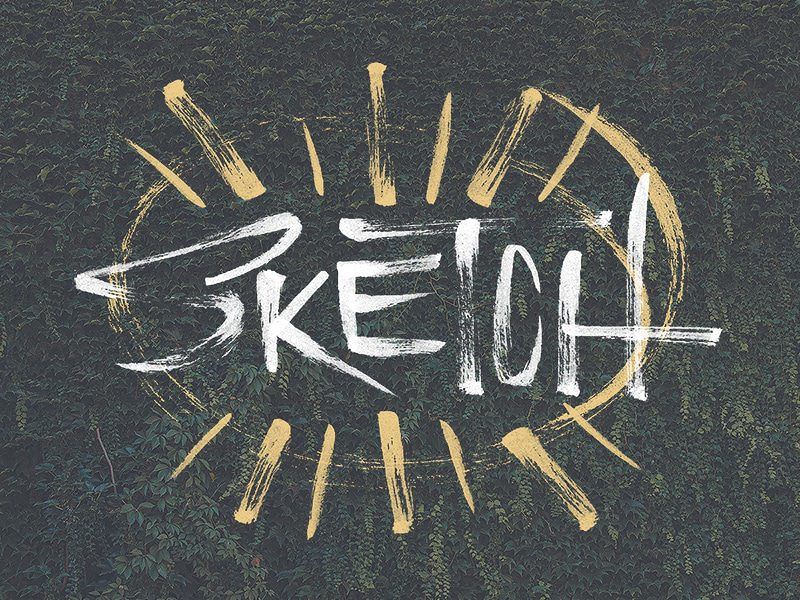
While the outcome looks pretty cool, there are a few issues with the lettering (specifically the letter spacing and sizes), I also want to incorporate one of the circles. This is where the joys of digital can help. Below, I reshaped the S, E, T, and C along with a few bits and pieces. Bish bash bosh, the finished piece.

Useful resource list: